Integrating an Existing Android Application With Vaandroid
You can integrate your existing Android application with Vaandroid. Your application can then be ported to both platforms.
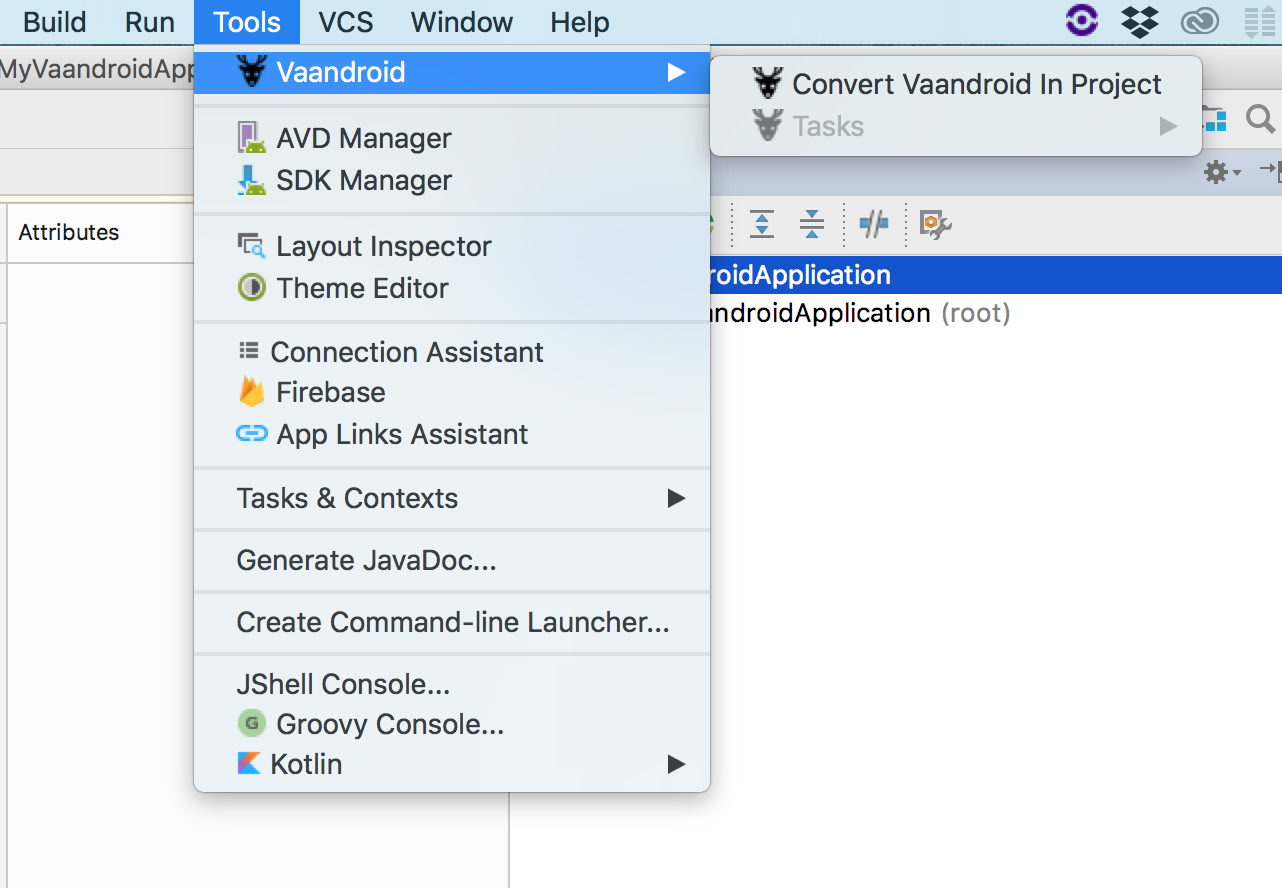
^If you are using IntelliJ and have installed the ((Vaandroid IntelliJ Plugin)), this can be done automatically, using a menu action.^
Using the Vaandroid IntelliJ Plugin
Follow the tutorial to convert Android to Vaandroid
Convert To Vaanrdroid
Resync Project
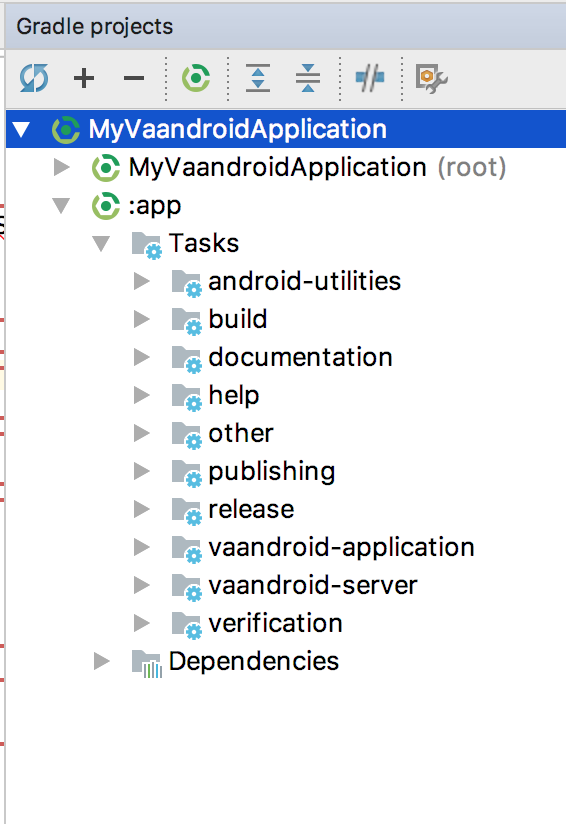
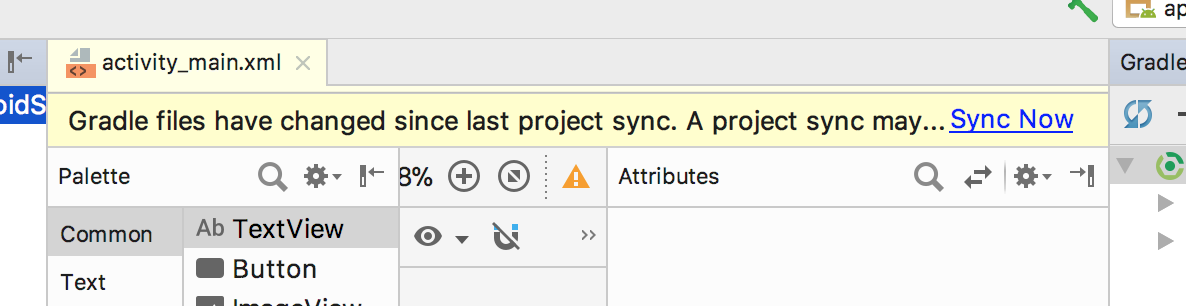 After your resync, the Android Gradle tasks will be replaced by Vaandroid Gradle tasks.
Change Code For IntelliJ Kotlin Workaround
    private val mOnNavigationItemSelectedListener: OnNavigationItemSelectedListener_fix = { item ->
        when (item.itemId) {
            R.id.navigation_home -> {
                message.setText(R.string.title_home)
                true
            }
            R.id.navigation_dashboard -> {
                message.setText(R.string.title_dashboard)
                true
            }
            R.id.navigation_notifications -> {
                message.setText(R.string.title_notifications)
                true
            }
            else -> false
        }
    }

    override fun onCreate(savedInstanceState: Bundle?) {
        super.onCreate(savedInstanceState)
        setContentView(R.layout.activity_main)

        navigation.onNavigationItemSelectedListener_fix = (mOnNavigationItemSelectedListener)
    }
Deploy, Serve, and Browse
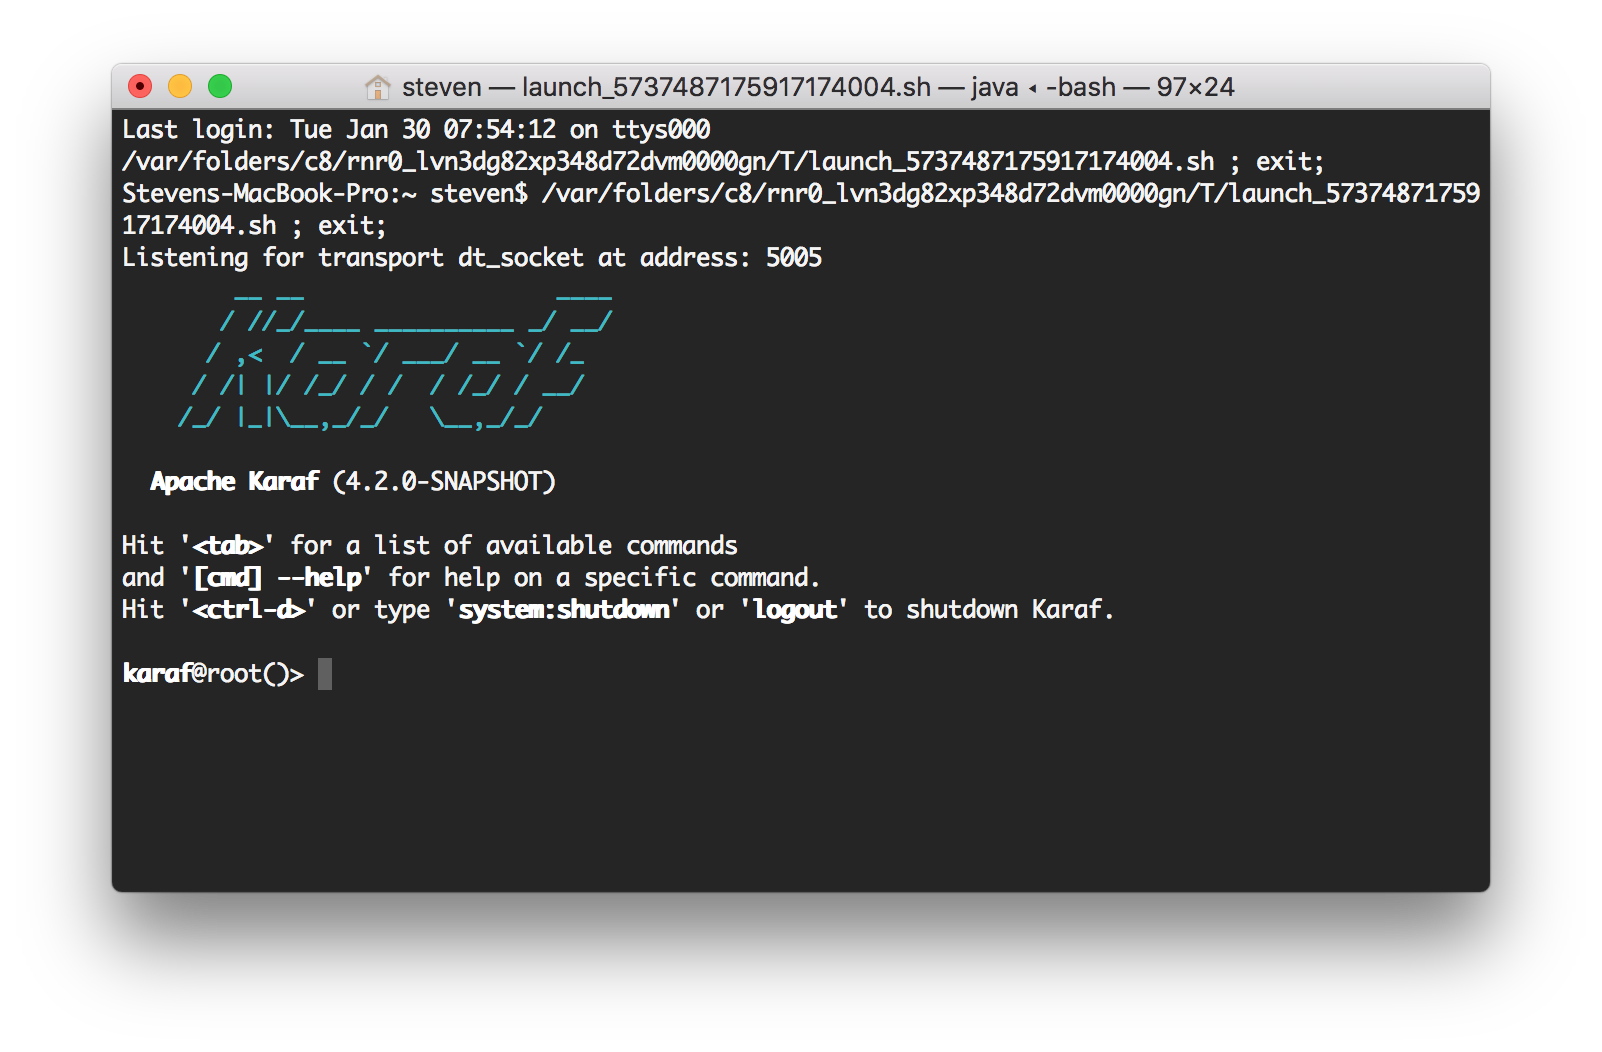
In one step, you can build your Vaandroid application, create and launch and cloud server, deploy your application, and open a browser.
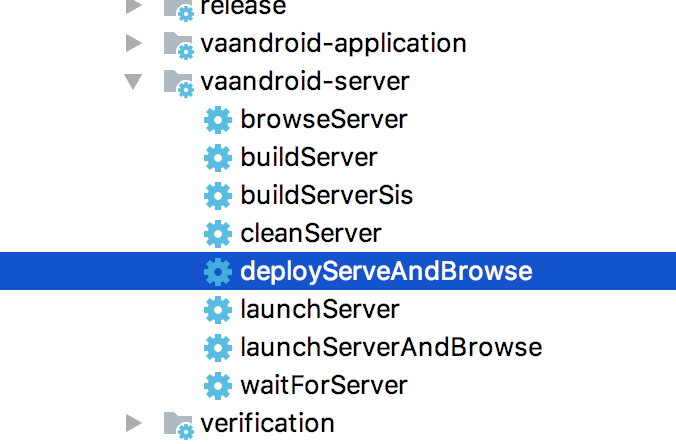
The cloud server terminal will open.
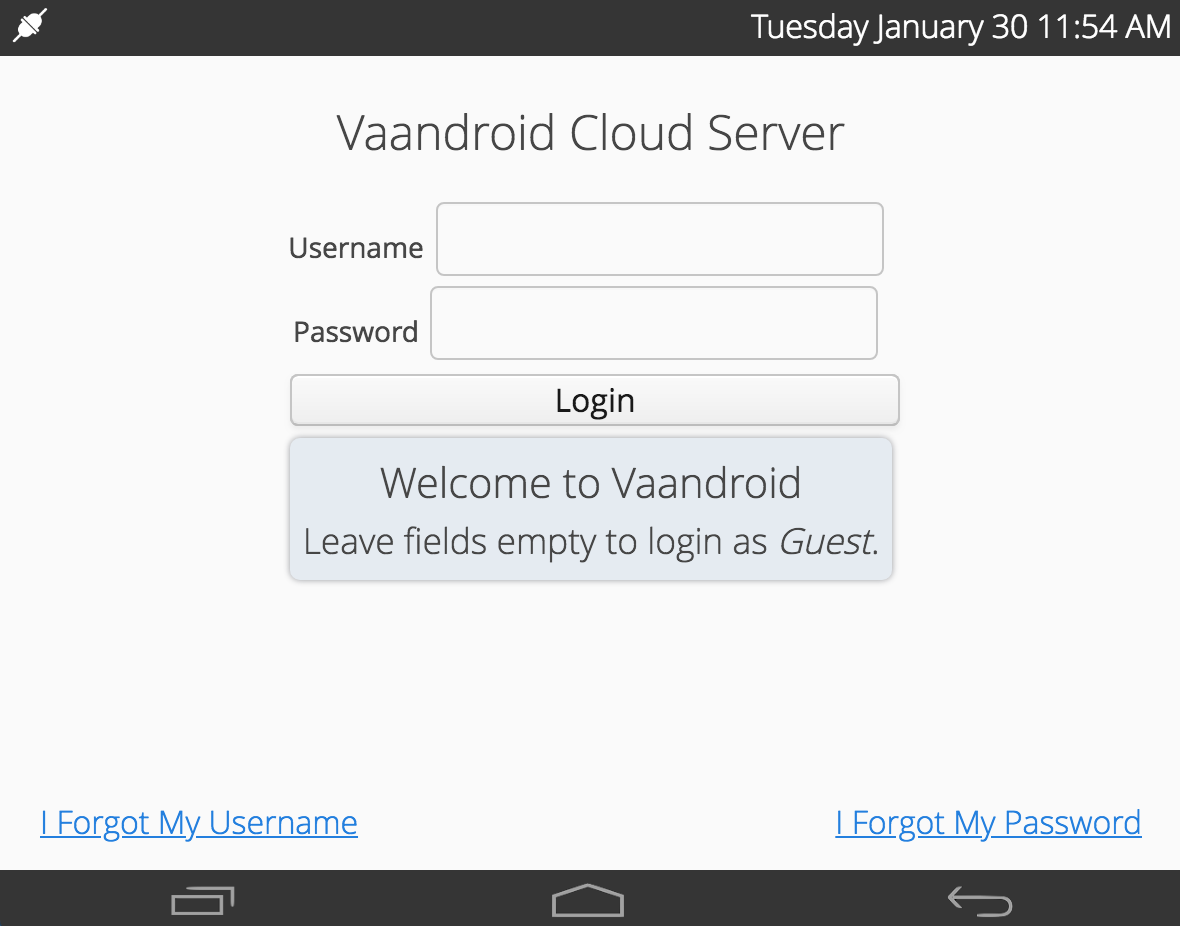
The login page will launch when the server is ready.
After login in, the home screen will display.
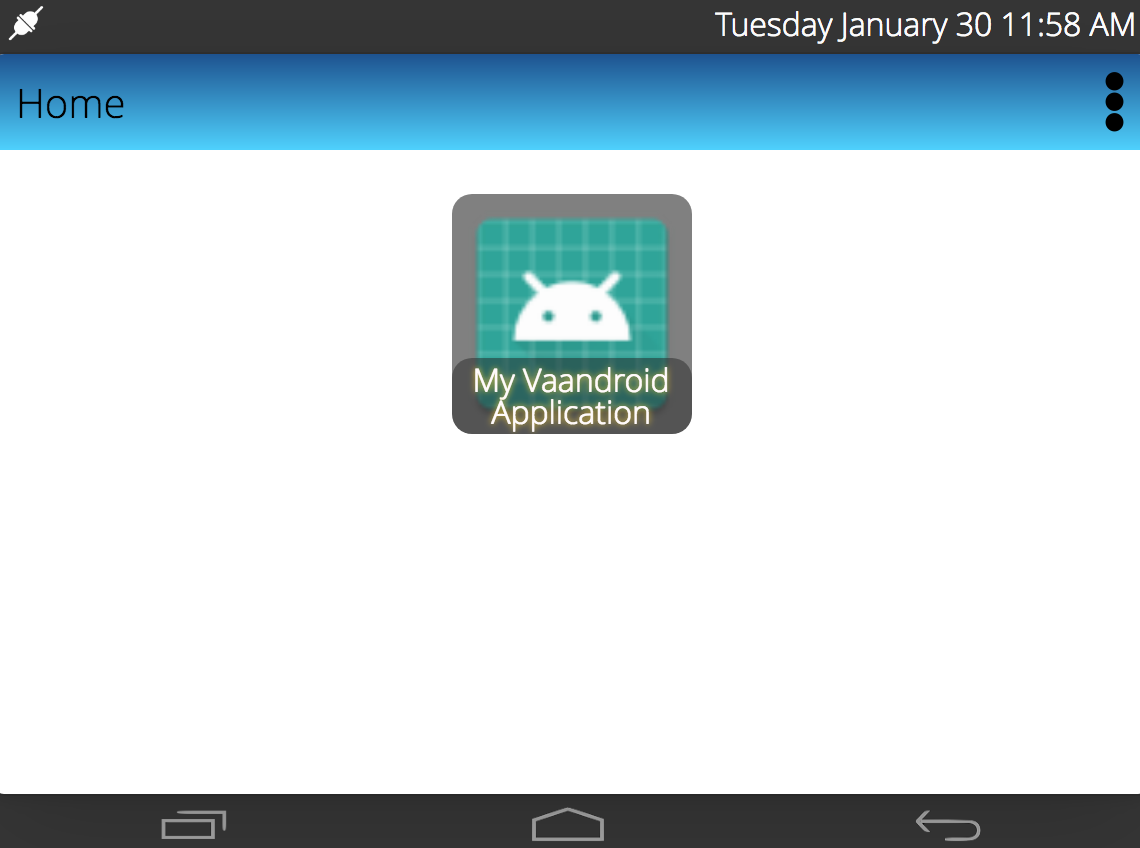
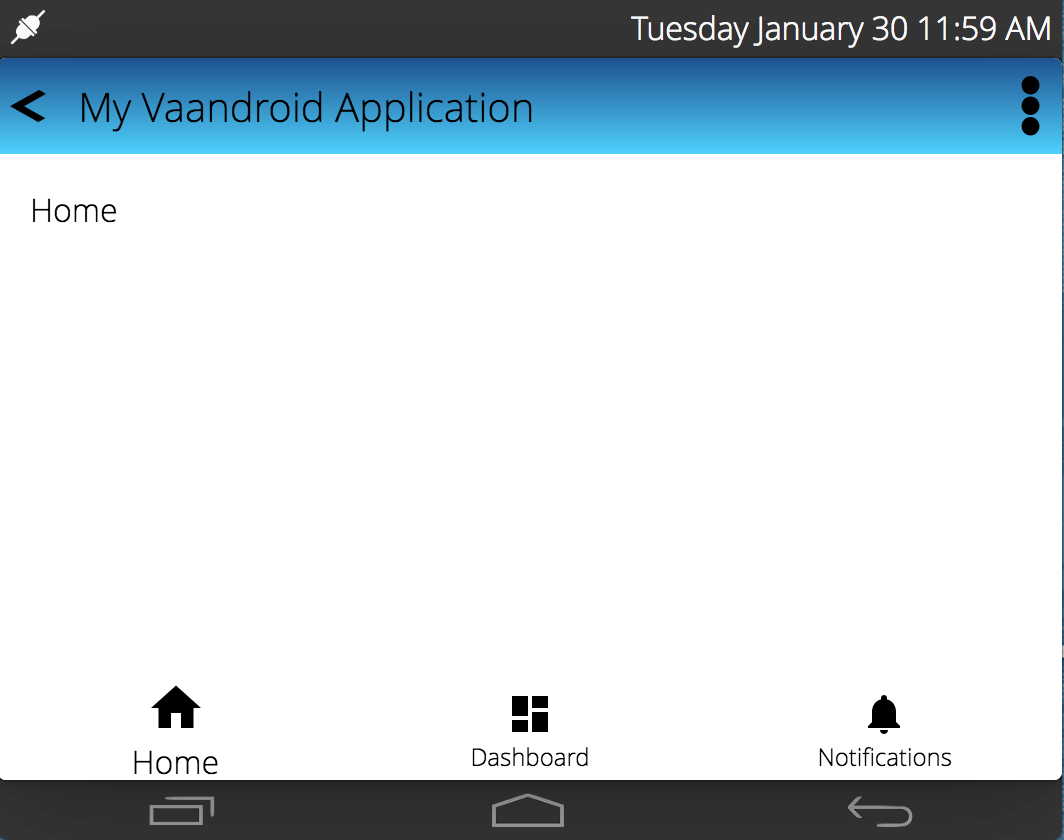
Launch the app!
Update the Android gradle.build files
A default Android project contains two gradle files: A project file and a module file. We basically just replace the Android settings with Vaandroid settings, while preserving the original Android code using a conditional statement. This way we can develop on both platforms in parallel.
^ The IntelliJ Vaandroid plugin provides a menu action to toggle between Vaandroid and Android settings.^
Update the project build.gradle file
- Define an ''ext.use_vandroid'' gradle extension variable in your buildscript. This will be used to switch between Vaandroid and the original Android build.
- Put the vaandroid code into an ''if (use_vaandroid) ...''
- Put the existing buildscript Android code into an ''else ...'' statement
{CODE(wrap="false" theme="default")}// Top-level build file where you can add configuration options common to all sub-projects/modules.
buildscript { ext.kotlin_version = '1.2.10' ext.useVaandroid = true repositories { mavenLocal() google() jcenter() } dependencies { if (useVaandroid) { classpath "org.jetbrains.kotlin:kotlin-gradle-plugin:$kotlin_version" classpath('tv.twelvetone.vaandroid.gradle:tv.twelvetone.vaandroid.gradle.plugin:1.0')
    } else {
        classpath 'com.android.tools.build:gradle:3.1.0-alpha06'
        classpath "org.jetbrains.kotlin:kotlin-gradle-plugin:$kotlin_version"
    }
    // NOTE: Do not place your application dependencies here; they belong
    // in the individual module build.gradle files
}
}
allprojects { repositories { mavenLocal() google() jcenter() } }
task clean(type: Delete) { delete rootProject.buildDir } {CODE}
Update the module build.gradle file
- Put the vaandroid code into an ''if (use_vaandroid) ...''
- Put the existing android code into an ''else ...'' statement
{CODE(theme="default")}if (useVaandroid) { apply plugin: 'kotlin' apply plugin: 'vaandroid-plugin' } else { apply plugin: 'com.android.application'
apply plugin: 'kotlin-android'

apply plugin: 'kotlin-android-extensions'

android {
    compileSdkVersion 25
    defaultConfig {
        applicationId "tv.twelvetone.test.helloandroid"
        minSdkVersion 25
        targetSdkVersion 25
        versionCode 1
        versionName "1.0"
        testInstrumentationRunner "android.support.test.runner.AndroidJUnitRunner"
    }
    buildTypes {
        release {
            minifyEnabled false
            proguardFiles getDefaultProguardFile('proguard-android.txt'), 'proguard-rules.pro'
        }
    }
}

dependencies {
    implementation fileTree(dir: 'libs', include: ['*.jar'])
    implementation "org.jetbrains.kotlin:kotlin-stdlib-jre7:$kotlin_version"
    implementation 'com.android.support:appcompat-v7:25.1.0'
    implementation 'com.android.support.constraint:constraint-layout:1.0.2'
    testImplementation 'junit:junit:4.12'
    androidTestImplementation 'com.android.support.test:runner:1.0.1'
    androidTestImplementation 'com.android.support.test.espresso:espresso-core:3.0.1'
}
}{CODE}
Add Vaandroid.xml
Add a Vaandroid.xml file to the root of your application. You can use the ''Create Vaandroid Application'' gradle task to create a default file. The default Vaandroid.xml file allows access to all activities and resources for the guest user in the Test Cloud Server.
See ((Vaandroid Gradle Plugin)) for more information.
Set The Plugin Id
By default, the bundle ID will be the name of the module. So for the default android project, the module will have an ID of ''app''.
We can either rename the folder or updated the gradle.build file.
Rename The Folder
- Rename the folder to com.acme.plugin.app
- Update the gradle.settings file
Update The Gradle file
{CODE(theme="default")}vaandroid { pluginId = 'com.acme.plugin.app' }{CODE}
Test The Application
- Follow instructions to launch a test server, deploy the Vaandroid application, and run in a browser. *When you want to run and use Android again, simply change the use_vaandroid variable to ''false'' and resync your Gradle project.